If you are making your first tentative steps into the world of large format print, you want to ensure you are set up to produce high-quality work as quickly as possible.
Large format printing is a powerful tool for creating high-impact visual displays, from banners and posters to billboards and trade show graphics. When the print rolls off the printer and you see the output, you want to be confident that the graphics are sharp, the colours are crisp, and the space has been used efficiently. Waste is costly and so is ink, so it’s worthwhile having a pre-print checklist to optimise your process as much as possible.
Your Large Format Pre-print Checklist
You’ve got your printer and you’re ready to get going, so follow our pointers below to ensure your projects meet expectations every time.
1. Check Your Designs
Whether you print someone else’s designs, or you create your own, take time to ensure that they are ready and suitable for print.
- Image resolution – Your images need to be of a high enough resolution so that the print is sharp and clear when viewed from the correct distance.
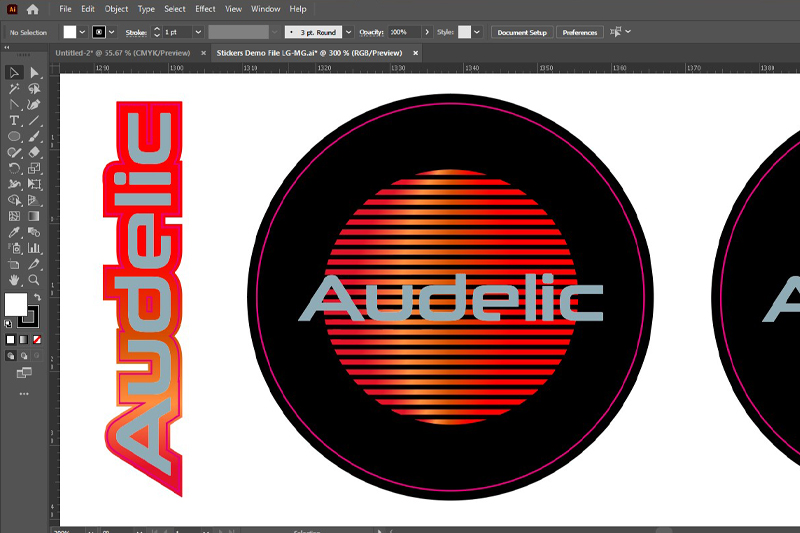
- Cutlines – Check that cutlines have been added and are where they should be, whether that’s on the edge of the design or offset from it.
- Special colours – Ensure that any special colours (spot colour or white ink) are visible and on the correct layer.
- Format – Make sure you have saved the artwork in the correct file format for the RIP to read.

Cut lines and special gloss ink as seen in Adobe Illustrator
2. Choose the Right Print Media
While you want to keep costs to a minimum, using poor-quality print media will ultimately lead to trouble down the line. Buying a quality machine and inks, only to waste time and money on cheap material is a mistake that too many inexperienced users make.
- Check your print media is compatible with the ink you are printing with and that it’s fit for purpose.
- Different media types have different properties, such as opacity, thickness, and texture so choose the right media for your project to ensure that your final product looks the way you want it to.
- Talk to your supplier for recommendations.
- They will have tested many substrates themselves and know exactly what materials are suitable for your project.
- Many common media types have print profiles to ensure optimal quality.
3. Check the Health of Your Printer
A wide or large format printer is a precision-engineered instrument but can be well looked after if you follow some basic steps, including regular manual maintenance and servicing to replace worn consumable parts.
In addition, Roland DG Connect is our machine-monitoring app that allows customers to check the 'health' of their printer including ink level status, monitor print heads for manual cleaning frequency, view wiper lifetime and check levels of liquid waste. Downloadable from the App Store or Google Play, Roland DG Connect simplifies production monitoring from your desktop and smart devices to keep your printer running at 'A-grade' performance.
Device Maintenance and Cleaning
It’s beneficial to get into good habits and have a regular cleaning and maintenance routine.
- Print Head, Capping Station and Wiper Blade Cleaning
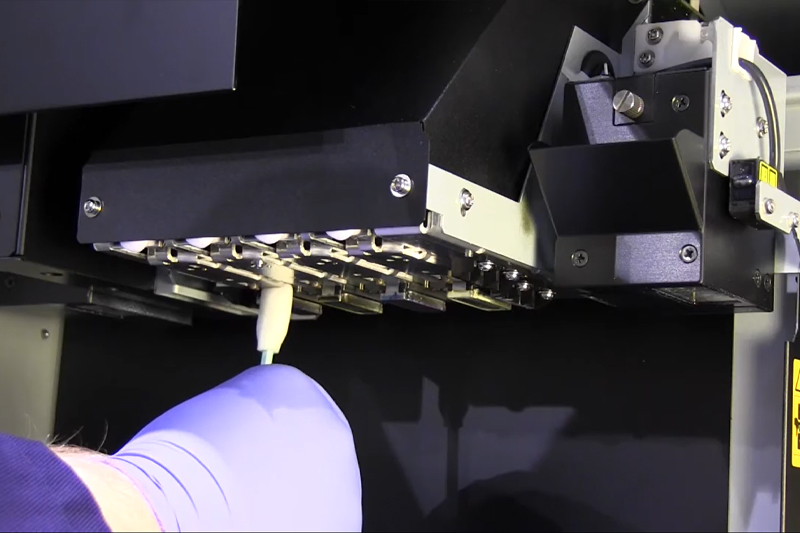
- Manual cleaning with a swab and cleaning solution will get rid of any old ink and make sure the nozzles don’t become clogged.
- Run a Test Print
- If there are gaps in the test, automatic or manual cleaning can often restore the print head channels to full function. If you have any doubts or queries, however, consult your product manual or contact your local Roland DG representative for further guidance.

Manually cleaning old ink from the printhead with a swab
4. Setting Up Your Printer
Having taken the time to prepare your artwork and select your substrate, the final step is to set up your large format printer.
Roland DG Connect
Repeating what has been outlined above, one of the initial steps to setting up your large format printer is to download and subscribe to Roland DG Connect. Choose the plan that fits your business needs to keep device/s running at optimum print performance.
Check Ink Levels
- Stay on top of how much ink you have, both in the machine and in reserve, so that you don’t lose valuable production time if you run out of ink mid-print.
Loading Your Media
- Try not to touch the printable area of your media as sometime fingerprints can be visible on the final print.
- Ensure that you load the media straight and that there is no telescoping of the roll, as this can cause head strikes.
Look After Your Media
- Label your media rolls so that you can easily identify the right one as backing sheets can look very similar.
- Keep your rolls of media at a consistent temperature with the print room as heating and cooling can cause warping and will affect print quality.
Configuring the Printer for the Media
You can create presets for commonly used media types that will help you speed up your workflow. Many TrueVIS models now come with touch screen controls and intuitive calibration processes that make configuration even easier. You can configure the printer for the media either in the RIP or in the functions menu on the device.
- Cut Calibrations in the Cut Config Menu
- Run a test cut to determine whether your settings are correct for your media.
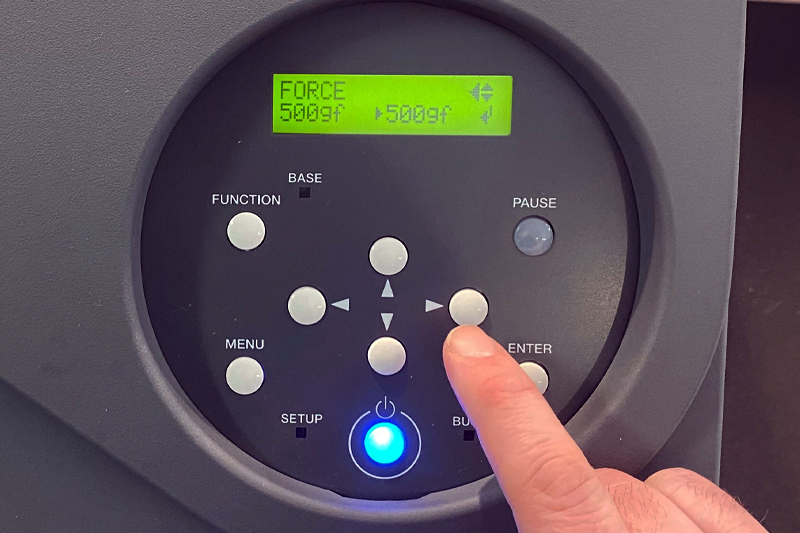
- Edit the cutting force as required using the settings in the config menu.
- You can also increase or decrease the cutting speed and amend the offset from this menu.
- Make sure your blade is in good condition with the right extension.
- Check that the condition of the cutting pad is acceptable.
- Bi-Directional Alignment
- When printing on flat substrates, most printers can print accurately in both directions as long as they hit the same point when the printhead travels
- To align this correctly, simply produce the built-in test print, read it, and input the appropriate value.
- Calibration or Media Gap Adjustment
- This is set depending on the weight and thickness of your material and ensures that the bands of print marry up perfectly. There’s no set value for this so use your device test prints, read them and input the correct values.

Cutting force set from Cut Config menu
Save a Preset
You can set up more quickly in the future for material you use regularly by saving the configuration you’ve saved on your device as a preset.
5. Final Checks
Open your file in your RIP software to make the final adjustments and checks to the project before pressing print.
- Check the layout of the print is correct and optimised to make the most of the media size.
- Check that you have the right media settings, scaling, position and print properties selected.
- Check that your quality, colour management and media profile settings are correct. There are colour management tools such as downloadable ICC profiles and built-in VersaWorks colour libraries that help ensure that your colours are accurate and consistent across all your prints.
- Ensure all cutlines and special colours which appear in the design software also appear in the RIP.
If you’re satisfied with your settings, press print!
Conclusion
Large format printing is a powerful tool for creating high-impact visual displays, so it pays to make careful consideration and preparation to avoid costly mistakes and produce the high quality your clients expect.
If you’d like more information on anything mentioned in this article, please contact your Roland DG representative, or talk to an expert here.
